How to Stain Your Front Door
Have you ever looked at the front doors of your home and felt a sense of history calling out to you? This tutorial will explore how to stain your front door (or any wooden door)!
Perhaps they’ve weathered years of wear and layers of paint, but you know that underneath those layers lies the raw beauty of natural wood waiting to be revealed.
In this blog post, I’ll share my own experience of transforming our wood front doors, taking them from 120+ years of layers of paint down to their original, raw state.
Disclosure: Affiliate links may be used in this post, at no cost to you.
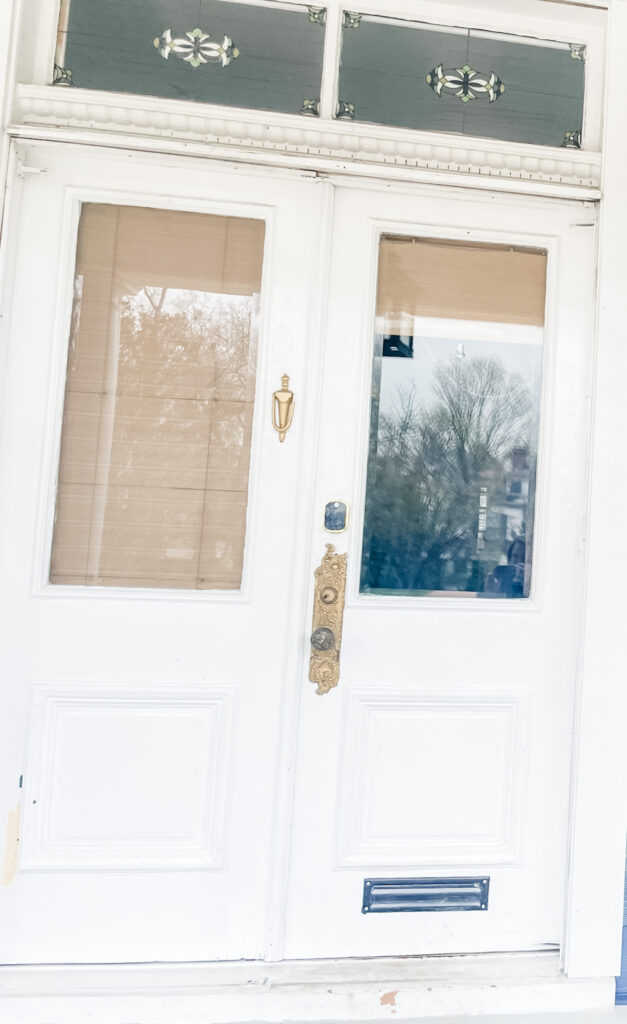
The Beginning: Unveiling Layers of History
Our front doors had layers of history and layers of paint that obscured their true character.
Despite my best efforts with chemical strippers and a heat gun (I decided not to try sanding because I knew there was lead paint underneath and I didn’t want to poison everyone), the stubborn paint clung to the wood, refusing to budge.
Frustrated but determined, I realized that I needed a different approach to uncover the hidden beauty beneath the surface.
The Decision: Seeking Professional Help
After numerous attempts to remove the layers of paint myself, I made the decision to seek professional assistance.
I don’t give up easily, but I just didn’t have the tools or the time to get this paint off of this beautiful front door.
I found a reputable company, Baltimore Finishing Works, who is experienced in historic restoration projects.
After careful consideration, we entrusted them with our beloved front doors.
Their method? Dipping the doors in a specialized solution to strip away years of accumulated paint without damaging the wood.
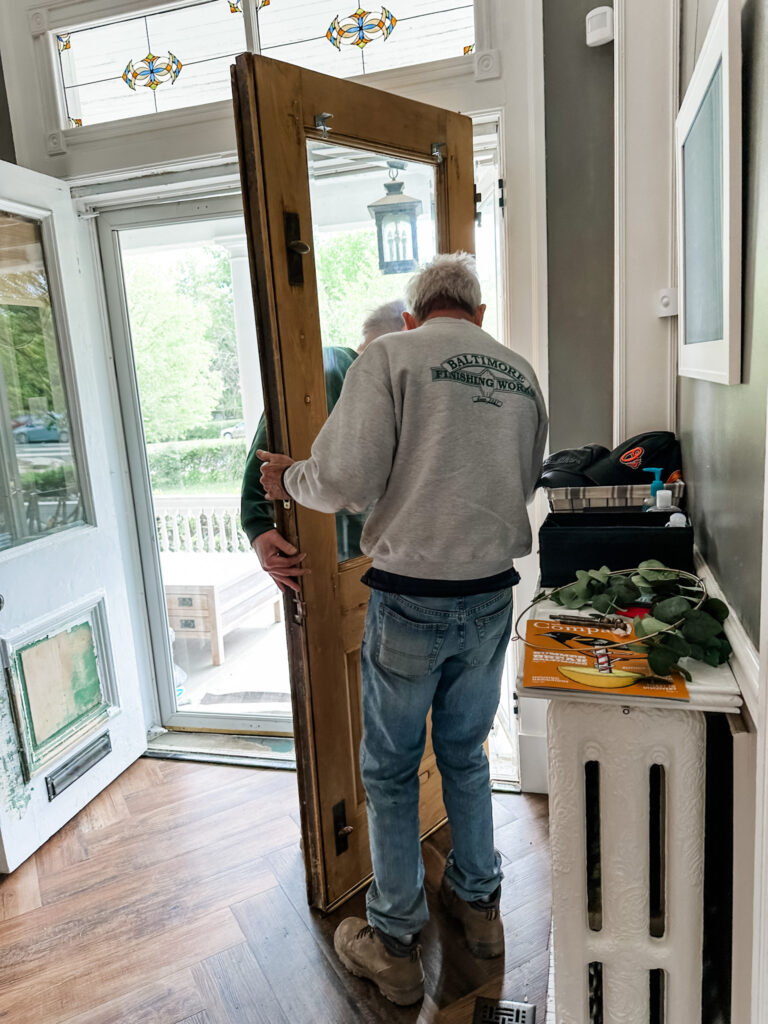
They did one door on the first day, bringing it back and installing it in the evening, and the second door on the next day.
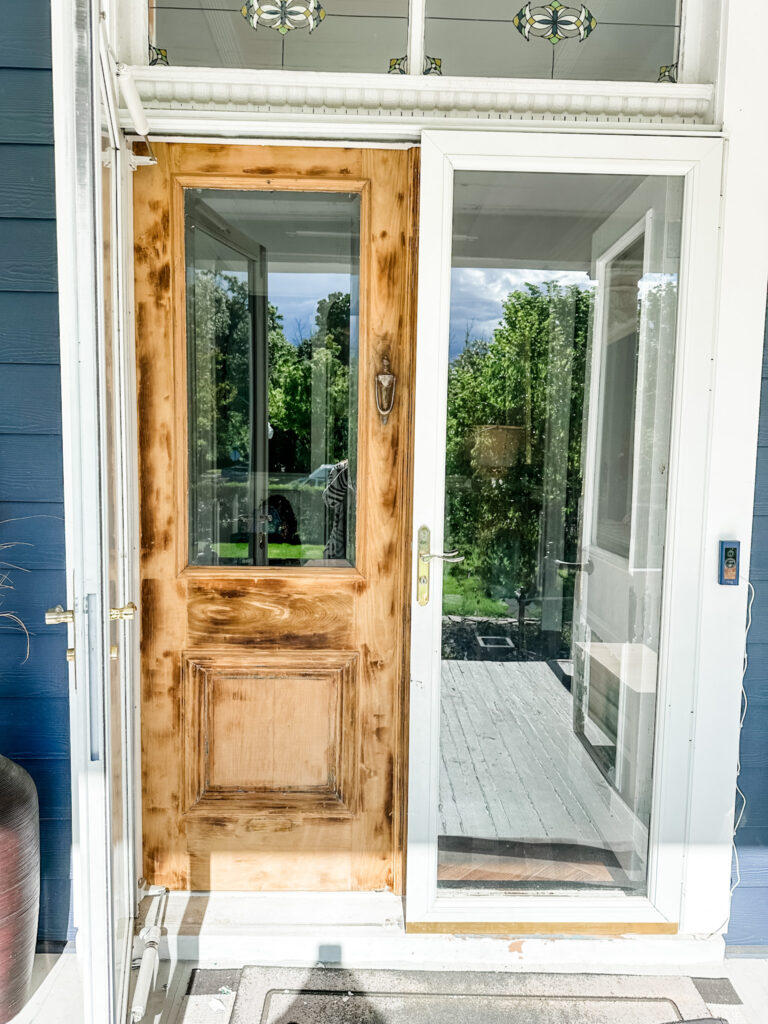
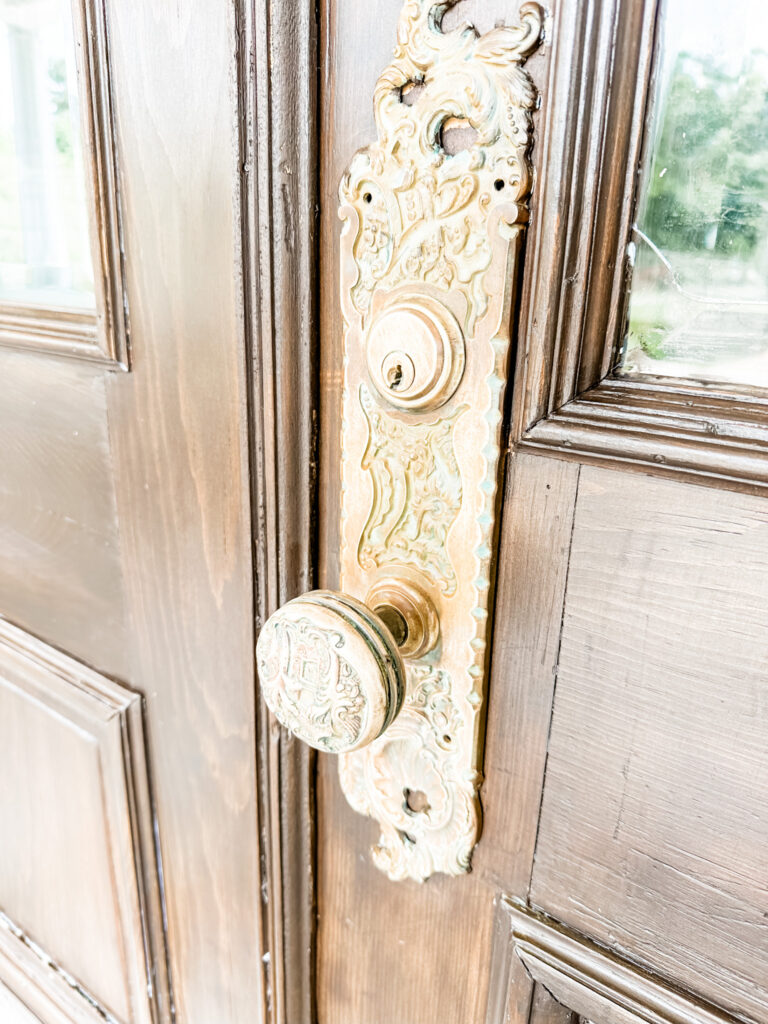
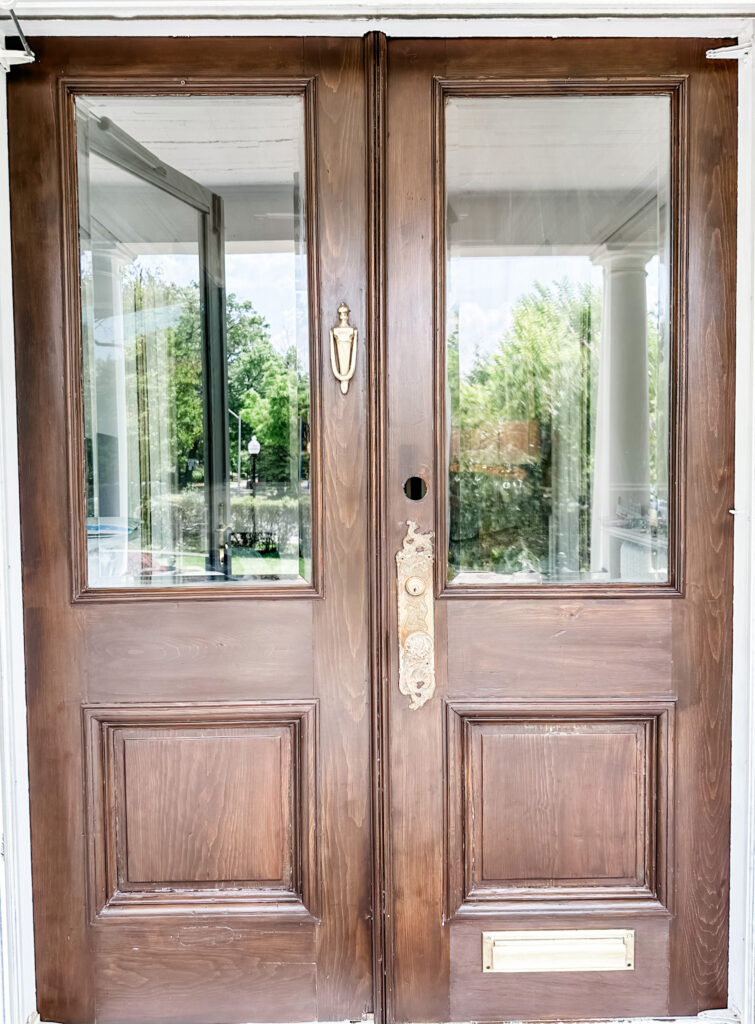
The Revelation: Exposing Raw Wood and Uncovering More History
When the doors were finally returned to us, we were greeted with a sight that took our breath away – the raw beauty of the wood in these old doors revealed for the first time in over a century.
It was a moment of awe for the history contained within those weathered grains.
The biggest surprise was finding the name of one of the previous owners engraved on the door knocker.
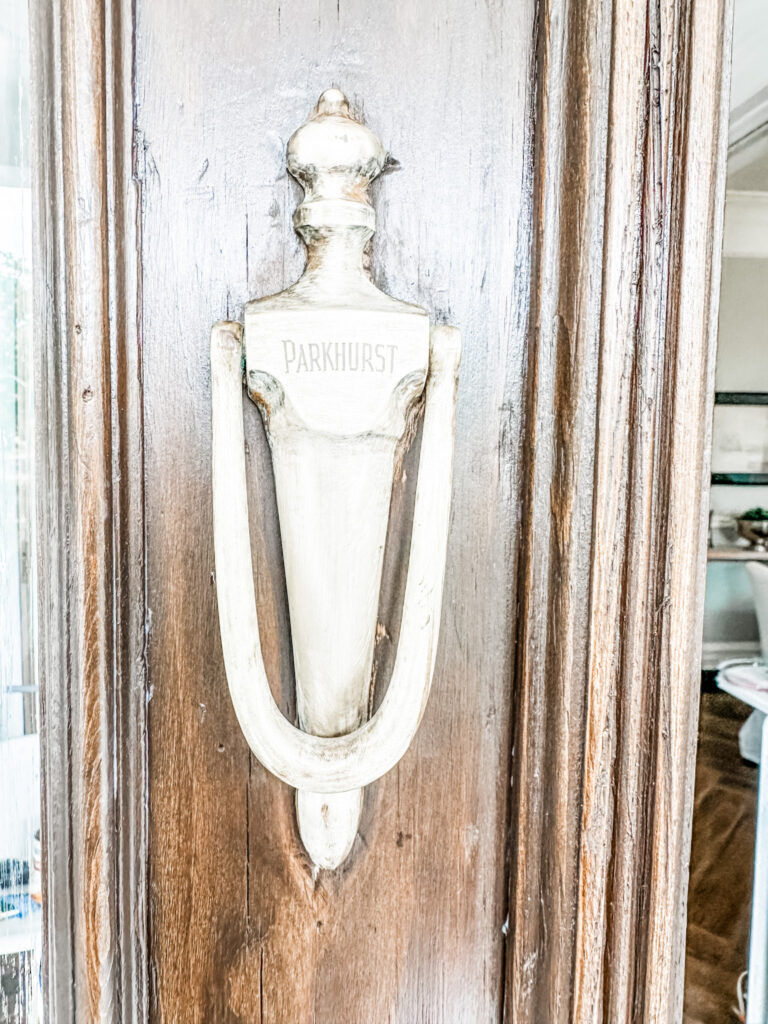
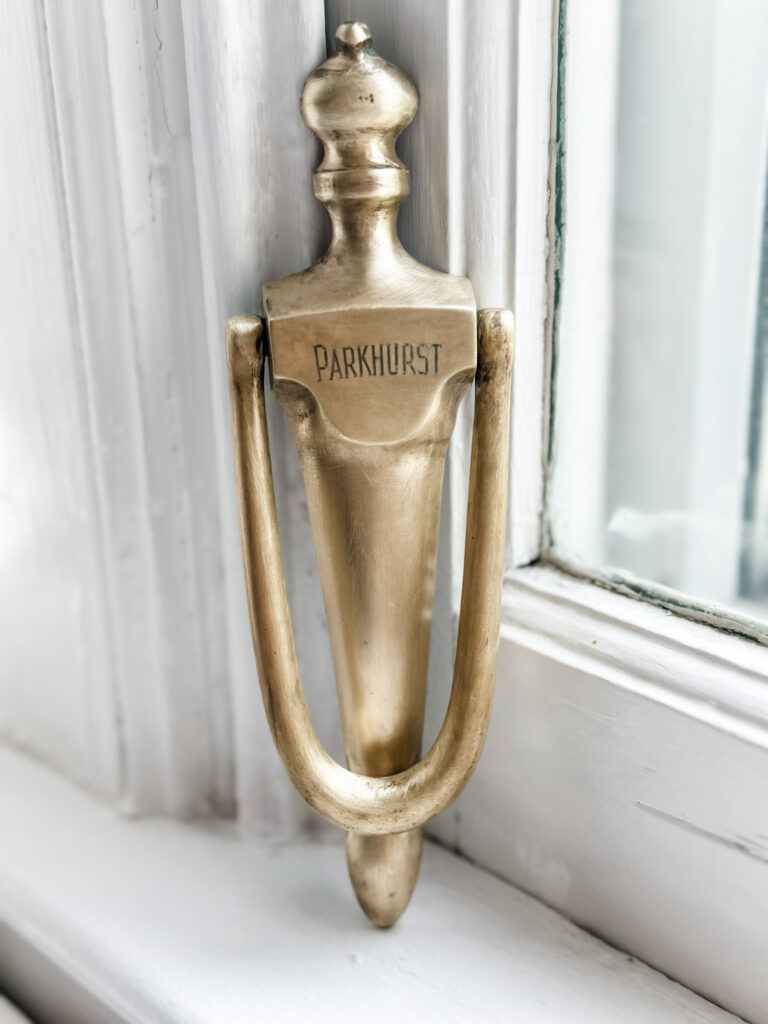
After a little internet stalking, I found the previous owner’s daughter and was able to gift this beautiful knocker back to her family- right where it belongs. I ordered the same one to replace it on our door.
Related: 5 Ways to Transform Your Space with Budget-Friendly Decor
The Transformation: Applying Gel Stain to your Wooden Door
With the doors now stripped down to their bare wood, we had to let them dry for about a week. The dry time will differ depending on which method you use to remove your paint. If there’s no lead paint to remove, using an orbital sander is the way to go! Next comes the fun- applying the stain and watching the transformation happen.
Here’s the process:
- Put down a drop cloth or a large tarp and use painter’s tape to protect the door trim from getting stain on it.
- Give the door(s) a light sanding, using 220 grit sandpaper (the higher the number, the finer the finish) until the surface of the door is smooth. Clean the doors after sanding so that they are free of debris.
- Choose your gel stain! I have used General Finishes, Old Masters, and Minwax brands and I like them all. For this project, I used Old Masters in the color “Rich Mahogany”. There are many rich colors to choose from in all the brands.
- Applying the gel stain is easy! Make sure you wear gloves because it’s messy! Use a tack cloth, an old t-shirt, or a foam roller to wipe or roll on the first coat of stain. Wipe in the direction of the wood grain. You will be amazed at how quickly the stain takes. Once you have a section covered, almost immediately wipe off the excess stain drips with a clean cloth.
- For this project, I only used one coat of stain because the coverage gave me a richer look than I expected. You may want a second coat of gel stain. Add your coats until you get the desired look.
- The final step for the proper care of your doors is to add a polyurethane varnish protective finish. This product will help protect the stain. I used this Minwax wipe-on polyurethane in a satin finish. If you want a more glossy look, you can go with a gloss finish.
- Add a total of 3 coats of polyurethane, sanding lightly with 220 grit sandpaper in between each application.
- Once the final coat dries, give it a light sand and buff using a buffer pad.
- Don’t forget to give the door hardware some attention. I sanded mine down and used brasso to let the brass plates shine through.
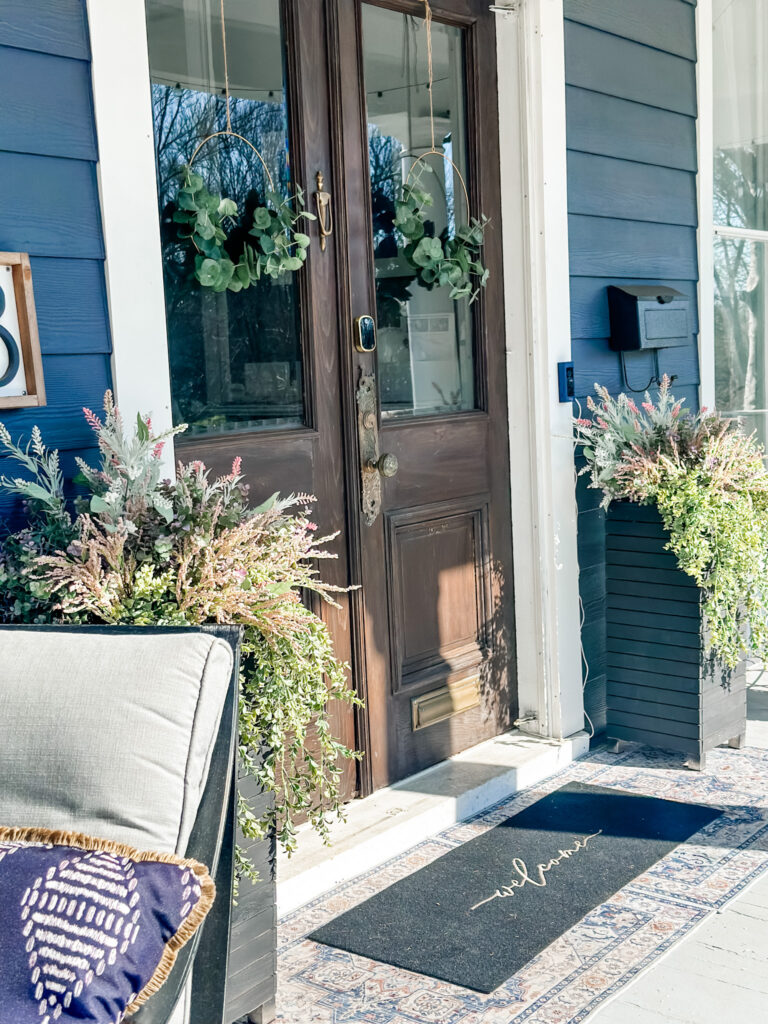
The Result: Resurrecting Elegance
Stand back and admire your handiwork.
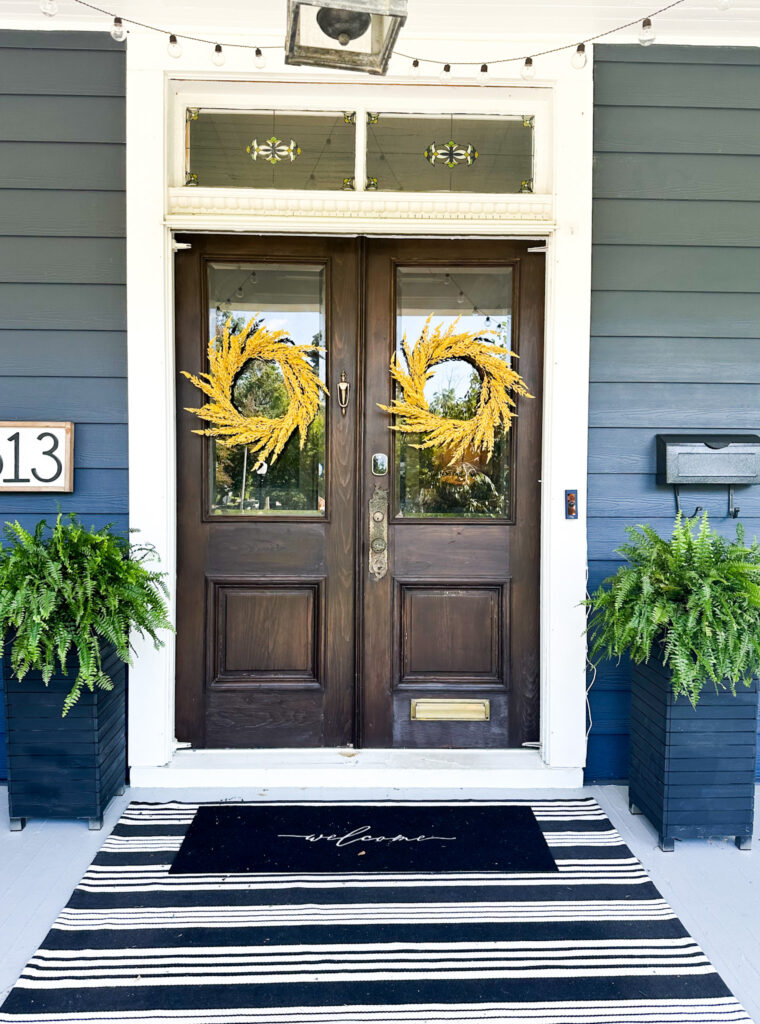
Our front door transformation gave a dramatic effect to the appearance of our home. I think it looks like we bought brand new doors.
Staining your front door will also give you great curb appeal and take your door from a weathered relic to an elegant focal point.
The rich tones of the gel stain accentuate the intricate grain patterns of the wood, adding depth and dimension to their timeless beauty.
While staining a door is a great DIY project, the process of paint removal is more advanced. Paint removal makes this not as cost-effective as my projects typically are.

Conclusion
In the end, our journey of DIY front door restoration taught me a valuable lesson in patience, perseverance, and appreciation for my home’s history.
By stripping away years of paint and applying a fresh coat of gel stain, we not only revitalized the appearance of our doors but also honored their natural beauty and history they represented.
Every scratch, knot, and imperfection told a story of generations past, reminding us to cherish the legacy of our home for years to come.
If you’re considering a similar project for your own front doors, don’t be afraid to seek professional assistance if needed, and remember to approach the process with care and respect for the history it embodies.
With the right tools, techniques, professionals, and a touch of love, you too can breathe new life into your home’s most cherished entryway. Happy staining!