DIY Large Scale Canvas Wall Art [On a Budget]
Are you in need of large-scale art that makes a big statement to fill that blank wall space?
Look no further! In this step-by-step tutorial, we’ll explore how to create stunning DIY canvas large-scale wall art using a few simple materials without the large-scale price tag.
With just a few steps and a little elbow grease, you can transform your blank canvas into a gallery-worthy masterpiece.
Follow this easy project tutorial to create a 4 foot by 4 foot canvas for your own extra large wall art!
Disclosure: Affiliate links may be used in this post, at no cost to you.
Gathering Materials:
The first step is to gather all the necessary materials:
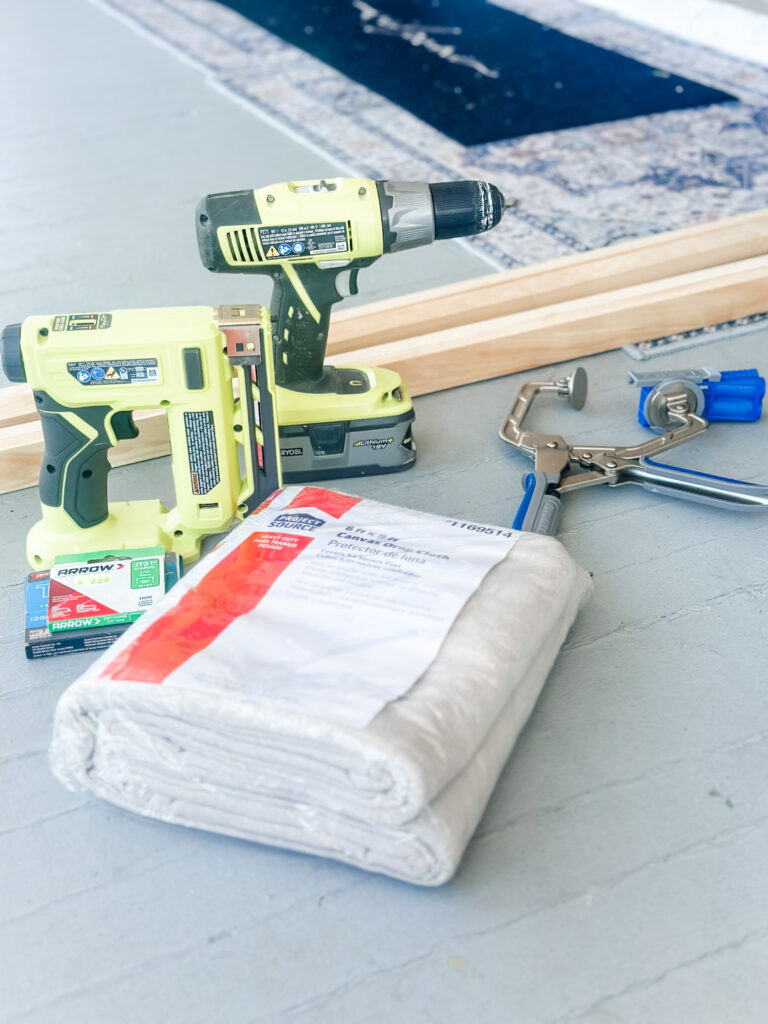
You will only need 2 tools for this project- a drill and a staple gun!
- Wooden Frame:
Lowes sells wood that is already cut, but if this is not the size you need, Lowes and Home Depot can cut the wood to the length that you need. For this project, I used this wood, sized 1″x2″x4 feet. You will need 5 planks. - Drop Cloth:
This will serve as the canvas itself. Look for a durable drop cloth that is smooth that is larger than the measurement of your art. The last canvas that I used had a seam down the middle- that was a surprise, but we made it part of the art. - Screws:
These will be used to assemble the wooden frame securely. If you want to be really professional, you can use a Kreg-jig to make pocket holes. Or do it the easiest way, and just screw the wood together from the outside. I’ve done them both ways, and they look the same! - Upholstery Stapler:
An upholstery stapler will make it easier to attach the drop cloth to the wooden frame, ensuring a tight and smooth surface. I am obsessed with this RYOBI stapler, because it doesn’t hurt your hands like the manual ones! This is a tool that I use over and over! If you already have other RYOBI tools, you can use your battery interchangeably with this one. If not, you will need to buy a separate battery and charger. - Gesso:
Gesso acts as a primer, providing a smooth and stable surface for your acrylic paints to adhere to. Full disclosure- you need at least 16 ounces to cover a canvas this big! - Acrylic Paint:
Choose your favorite colors to bring your artistic vision to life. Acrylic paints offer vibrant hues and are easy to work with. Here is a great starter kit if you aren’t sure where to begin!
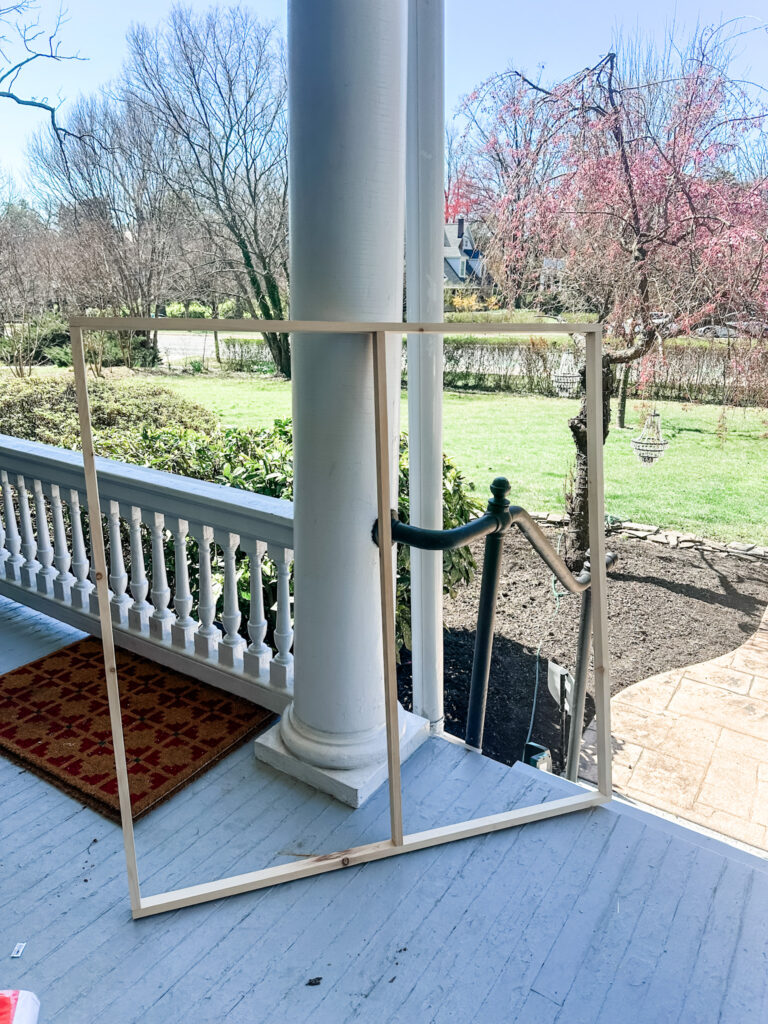
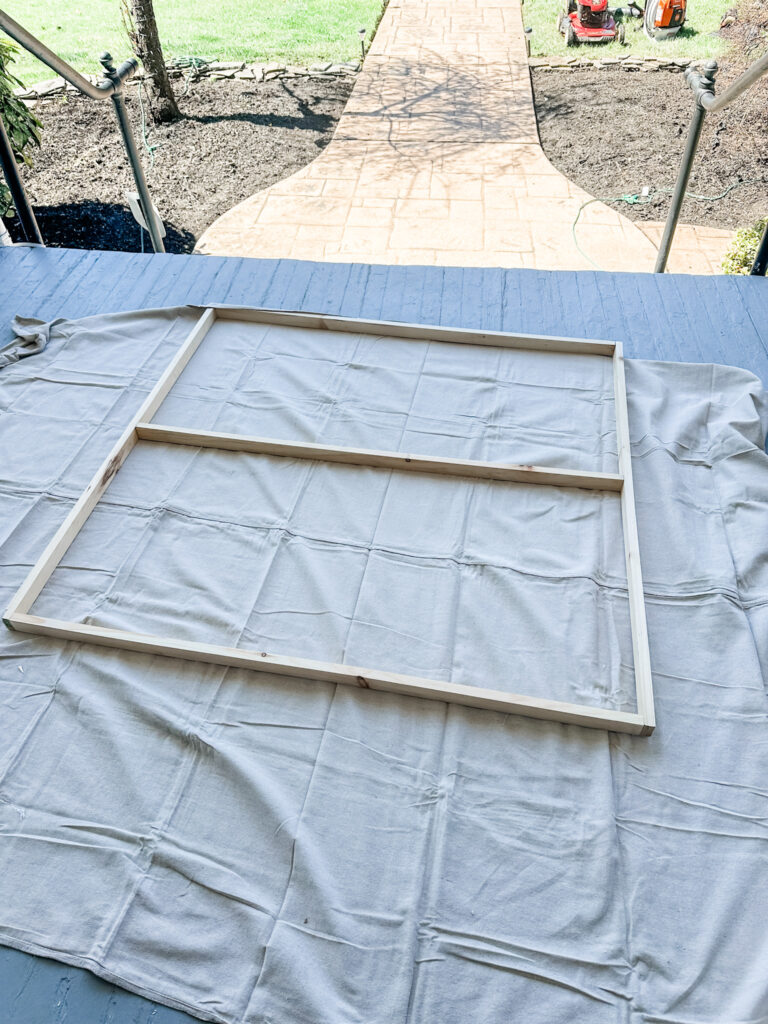
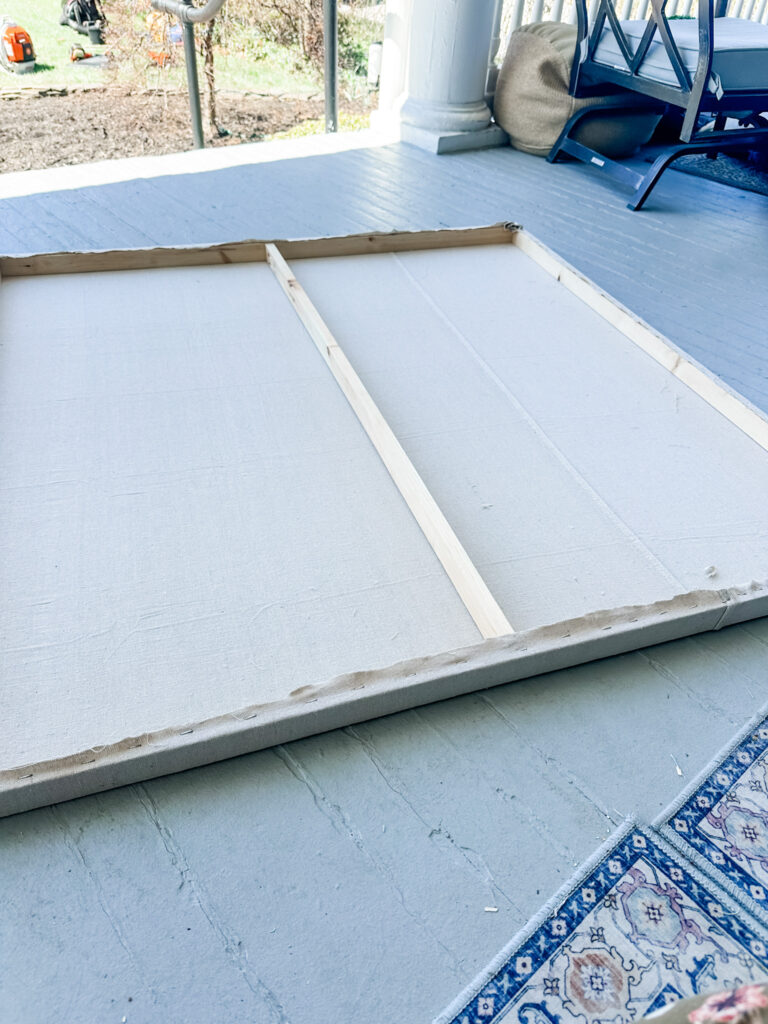
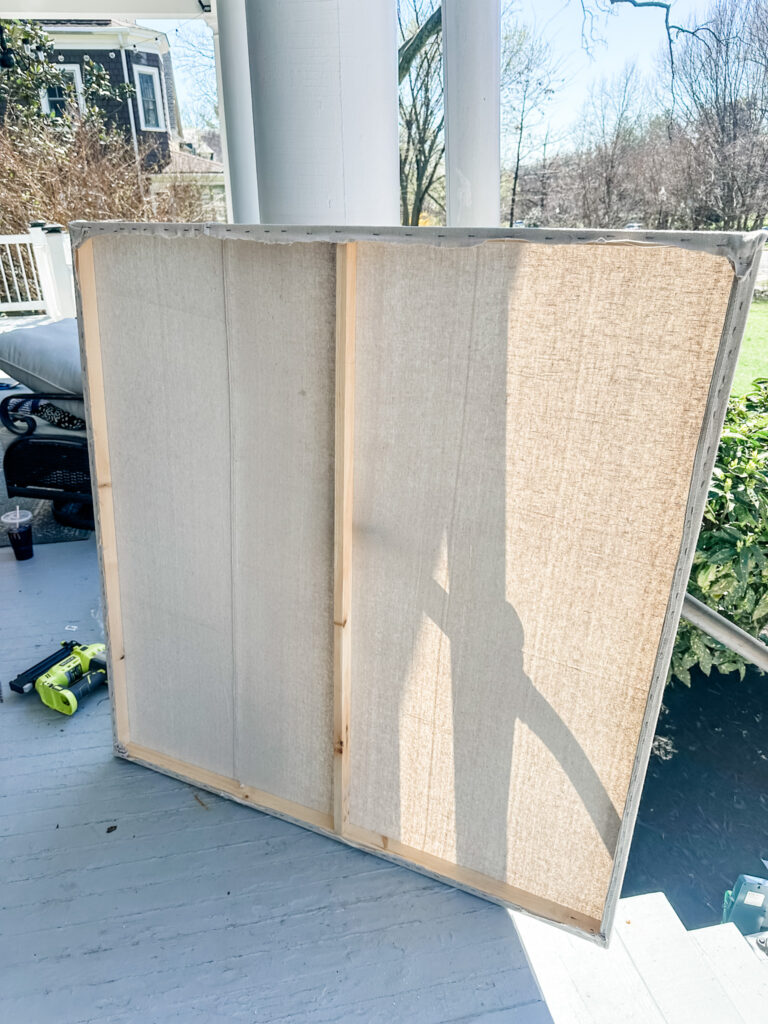
Step 1: Building the Frame
If you are using the pre-cut wood, begin by putting your 2 pieces of wood together, creating a 90 degree angle.
Pre-drill the holes into both pieces so that your screws don’t split the wood.
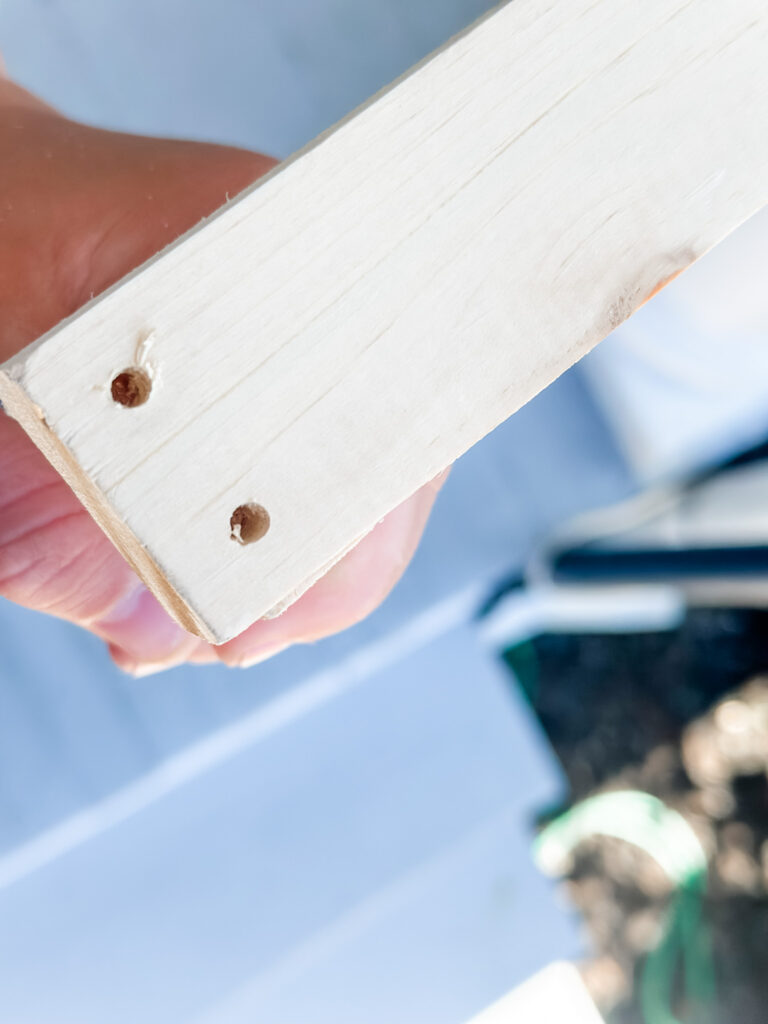
If you prefer to use pocket holes, go ahead and drill those first.
Use screws to assemble the frame, ensuring it is sturdy and square.
Add a support piece of wood in the center to give it extra support.
I added some brad nails on this one, too. You won’t need them if you use pocket holes.
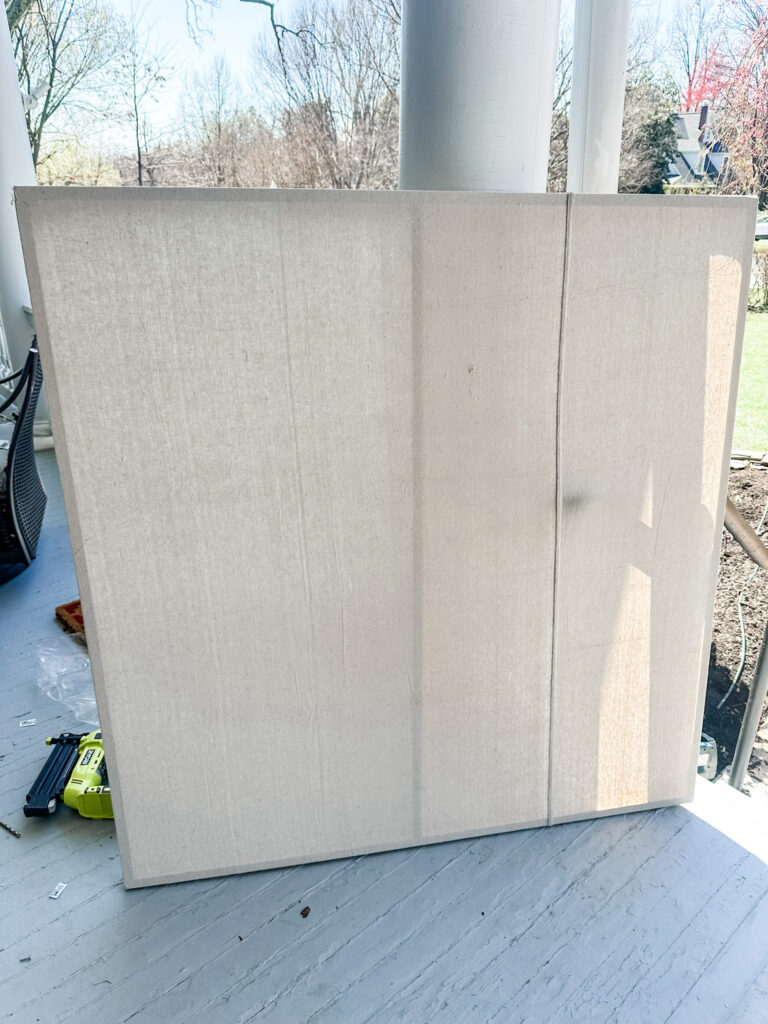
Step 2: Preparing the Canvas
Lay out the drop cloth on a flat surface.
Make sure the drop cloth is smooth.
You can iron it beforehand, but those wrinkles will come out once you get it onto the frame, as long as it’s pulled tightly.
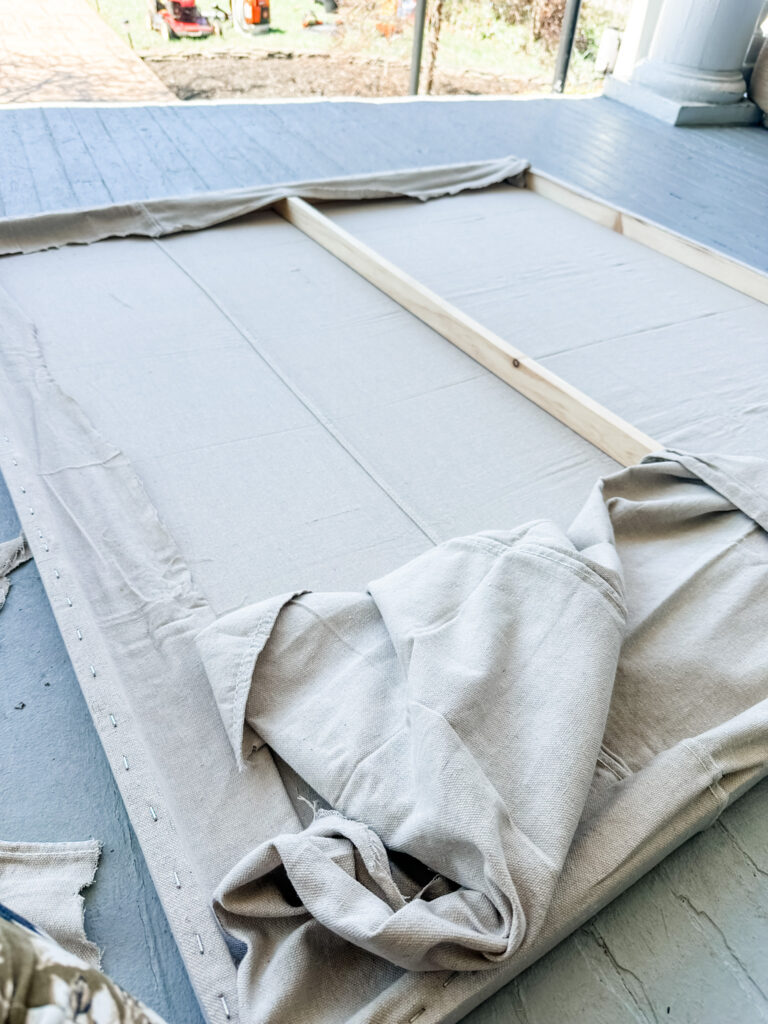
Step 3: Attaching the Canvas to the Frame
Position the wooden frame on top of the drop cloth.
Using the upholstery stapler, begin attaching the drop cloth to the frame, starting from the end of one side and working your way toward the other end.
I like to use one of the seams on the canvas itself to start.
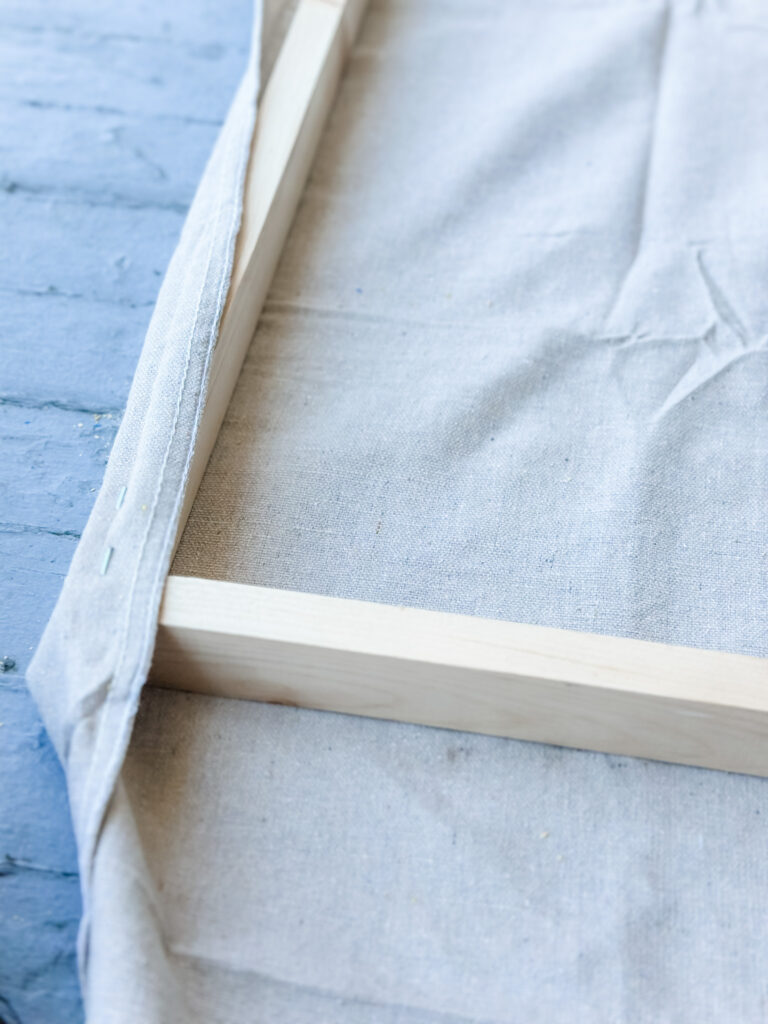
Pull the drop cloth taut as you staple, ensuring a snug and even fit.
Pull the canvas tightly and those wrinkles will come right out. Cut off the extra fabric once it is stapled on.
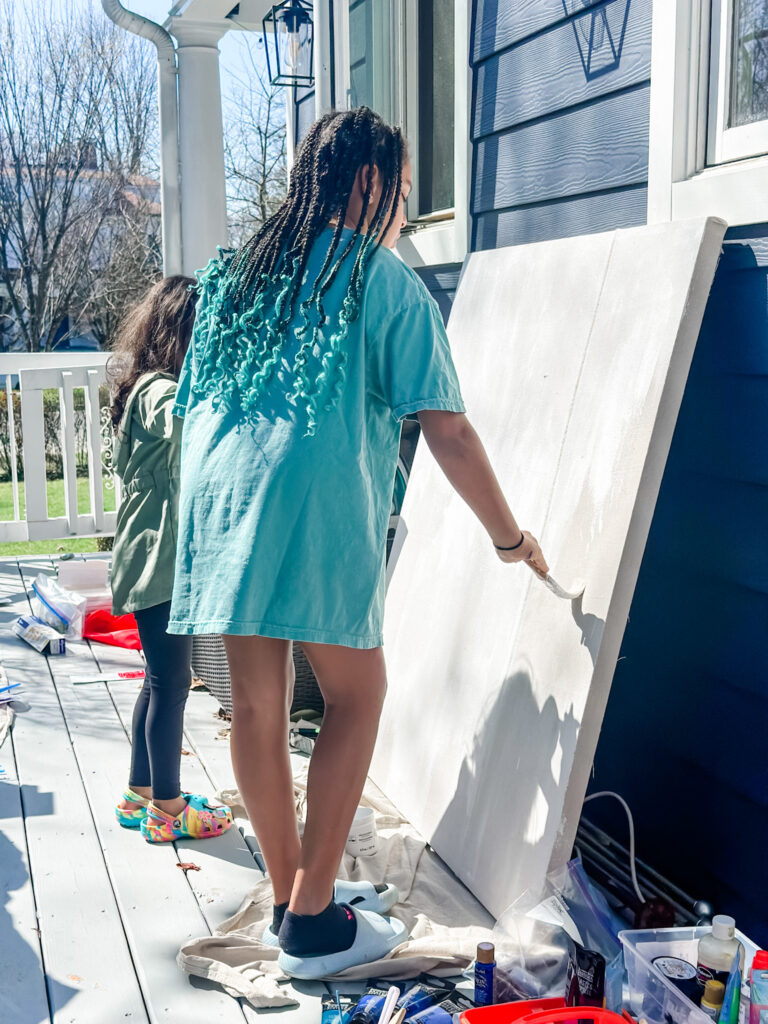
Step 4: Priming with Gesso
Once the drop cloth is securely attached to the frame, it’s time to prime the canvas with gesso.
Apply a thin, even layer of gesso using a brush or roller, covering the entire surface of the canvas.
Allow the gesso to dry completely before proceeding to the next step.
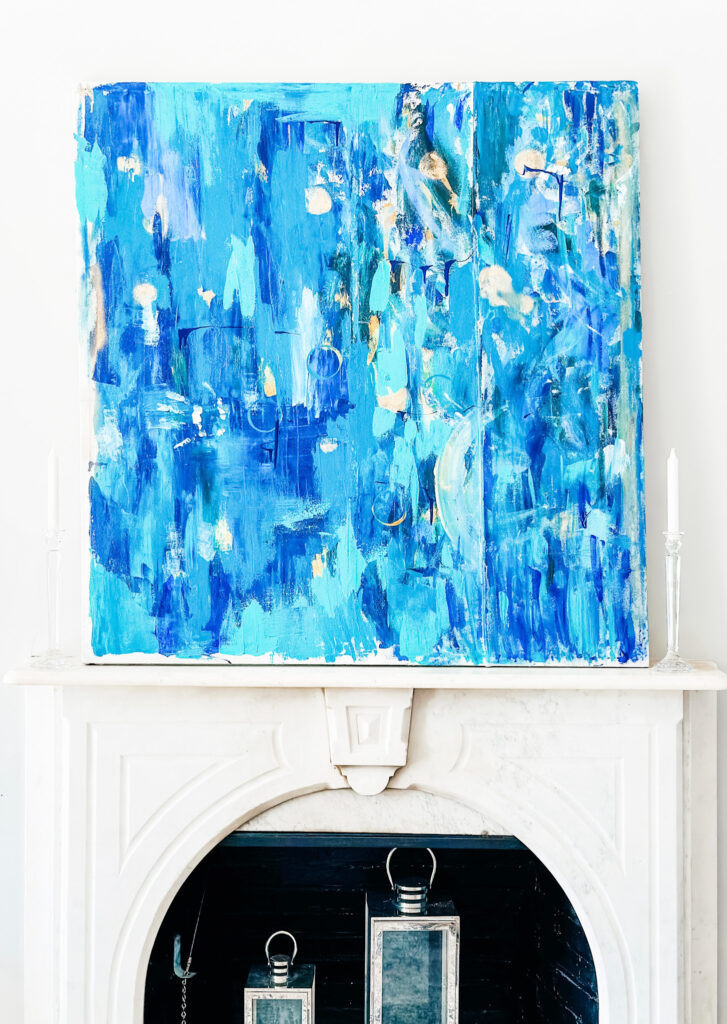
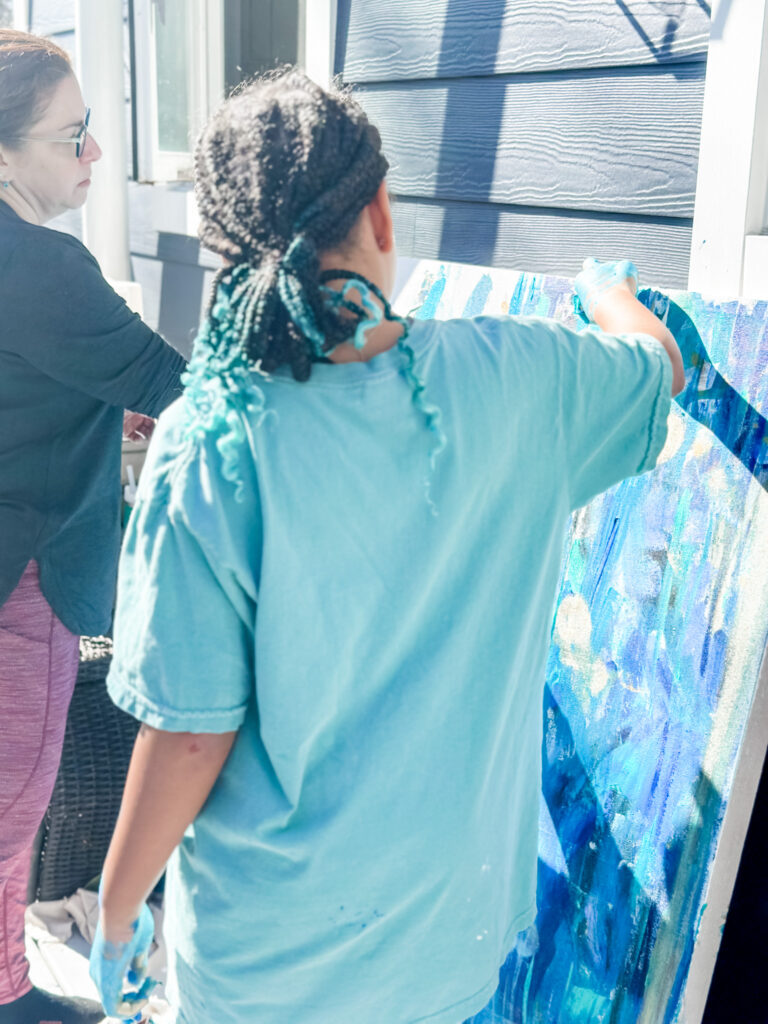
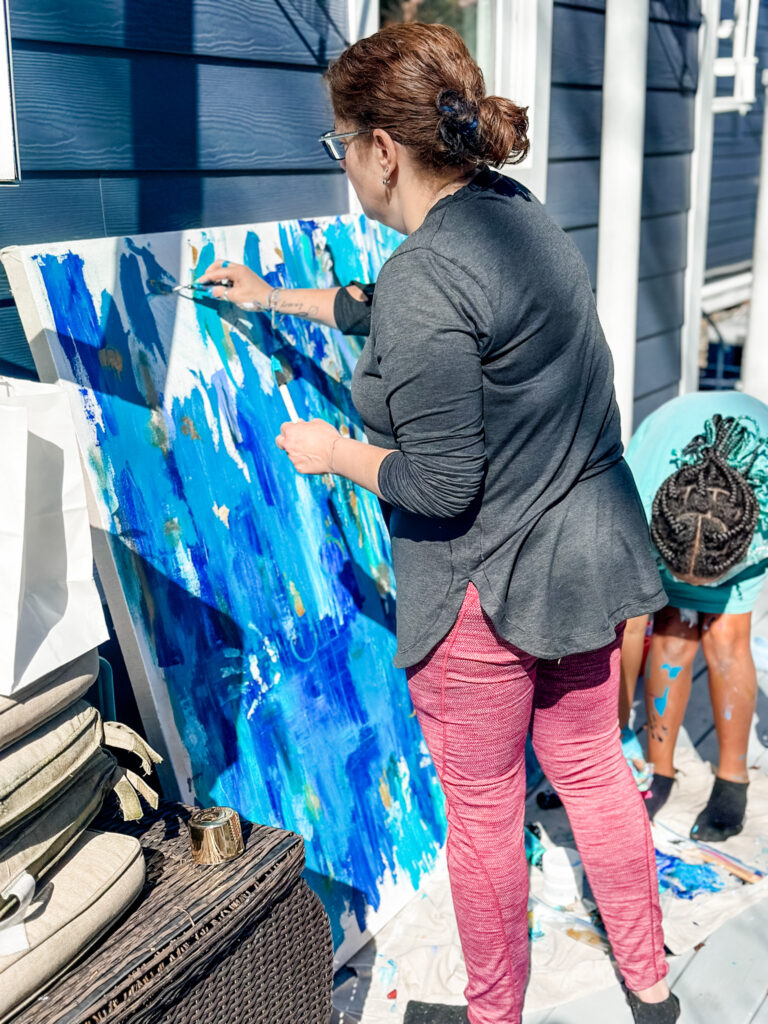
Step 5: Unleashing Your Creativity with Acrylic Paints
Now comes the fun part – painting!
I do not consider myself an artist, but I know what colors I want and I love abstract art.
And every time I walk into a store like Homegoods, I see their beautiful large scale art pieces and I think “I could paint that”!
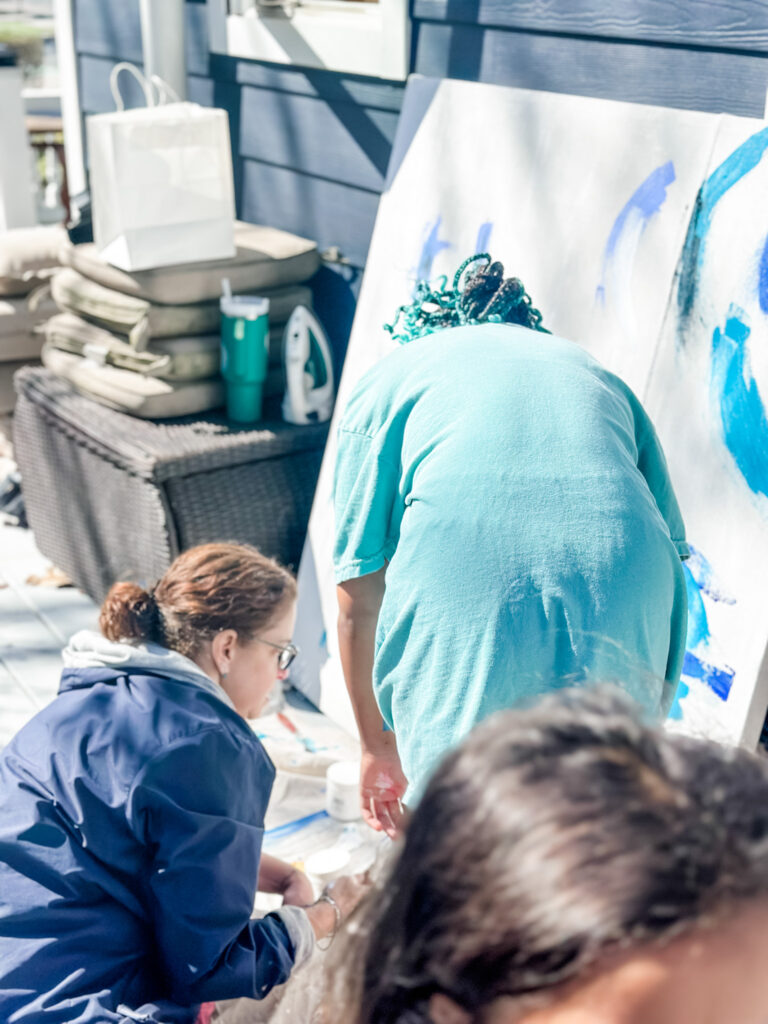
Use your acrylic paints to create your desired design or masterpiece on the primed canvas.
Whether you prefer bold abstract strokes, intricate patterns, or serene landscapes, let your imagination run wild.
The best part of this DIY wall art project is that your whole family can be involved in its creation.
Step 6: Finishing Touches
Once you’re satisfied with your artwork, allow the paint to dry thoroughly.
Depending on the complexity of your design, you may need to apply multiple layers of paint for depth and richness of color.
Once dry, you can add any final embellishments or details to enhance your canvas art.
Step 7: Displaying Your Creation
Finally, it’s time to proudly display your very own large wall art for all to admire.
Hang it on a prominent wall in your home or office, where it can serve as a focal point and conversation starter.
Alternatively, you can lean it against a wall for a more casual and contemporary look that makes a huge impact.
Conclusion
Creating DIY large-scale artwork is a rewarding and fulfilling project that allows you to express your creativity and style.
With just a few basic materials, a bare wall, and a little bit of patience, you can make your own canvas and your own art and transform ordinary materials into extraordinary home decor. So why wait?
Roll up your sleeves, head to the hardware store, unleash your inner artist, and start creating your own masterpiece today! Happy crafting!
![IKEA Aurdal Closet Transformation [Kid’s Room]](https://drdiyrenovation.com/wp-content/uploads/2025/08/portrait-blog-photo-2-768x1024.png)
![Easy Wall Trim Ideas to Elevate Any Room [DIY]](https://drdiyrenovation.com/wp-content/uploads/2025/01/portrait-blog-photo-28-768x1024.png)