How to Use a Mood Board to Plan Your Next DIY
I hear from people all the time who want to redo a room in their home but don’t know where to start. Does that sound familiar? Maybe you have an idea of what you like or a couple dozen images saved on Pinterest. But how do you pull all those things together into a cohesive design? The answer: a mood board.
Some people can easily envision a room in their mind’s eye, but most of us need visuals to imagine how a room will turn out with all the elements we’ve chosen. So, whether you’re revamping a room, DIYing a piece of furniture, or designing your dream garden, a mood board can help you bring your vision to life. Let’s talk about how to create a mood board to help you plan your next DIY project.
What is a Mood Board?
A mood board is a visual collage that includes images, color swatches, textures, materials, and inspiration. It serves as a reference point that keeps you focused while you plan and execute your design. Mood boards can be physical, but I prefer to create digital mood boards using Canva. You don’t even have to start from scratch, you can use one of their existing templates.
Here’s a mood board I created for my daughter Arden’s bedroom.

Why Use a Mood Board for DIY Projects?
Mood boards provide clarity and inspiration. If you ask me, they’re essential for beginner home DIYers. Here’s why they are so useful:
- Visualize the Outcome: They help you see how different elements work together before you start.
- Stay Organized: A mood board keeps your ideas in one place so you don’t get overwhelmed with too many options.
- Make Confident Decisions: Seeing your concept laid out visually helps you select colors, materials, and styles with confidence.
- Communicate Your Vision: If you’re working with family, friends, or contractors, a mood board ensures everyone is on the same page.
Step-by-Step Guide to Creating a Mood Board for Your DIY Project
1. Define Your Project Goals
Before you start collecting inspiration, clarify the purpose of your DIY project. Ask yourself:
- What do I want to achieve with this project?
- What is my budget and timeline?
- What style or theme am I drawn to?
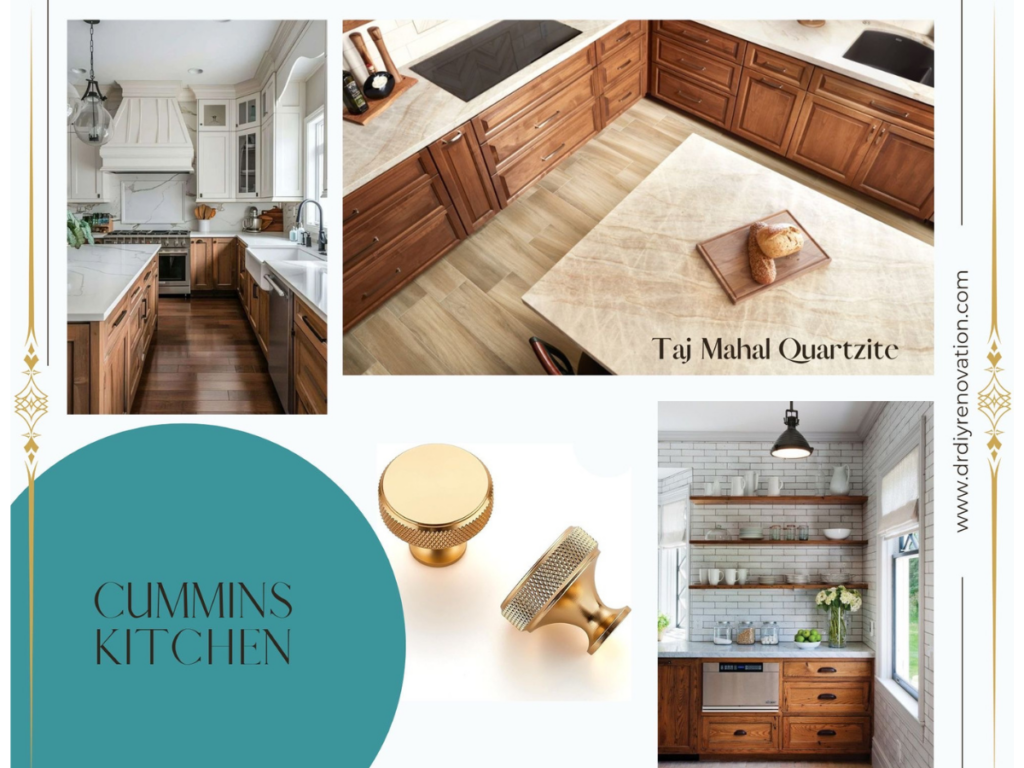
Having a clear goal will help you choose relevant images and materials. The mood board below is for a friend’s kitchen. As you know, kitchen design elements can get very expensive. This moodboard helped us balance high-end style with affordability.
2. Gather Inspiration
Start collecting images, textures, and materials that inspire you. You can find inspiration from:
- Pinterest: Create a dedicated board and pin images that align with your project.
- Magazines: Cut out pictures of styles, colors, and ideas that you love.
- Home Improvement Stores: Collect paint chips, tile or wallpaper samples, and fabric swatches.
- Social Media & Blogs: Follow DIY influencers or websites that align with your aesthetic.
3. Choose a Color Palette
Color is a crucial element in any DIY project. Select a cohesive color palette by:
- Picking a primary color as your base.
- Choosing complementary colors for accents.
- Incorporating neutral tones for balance.
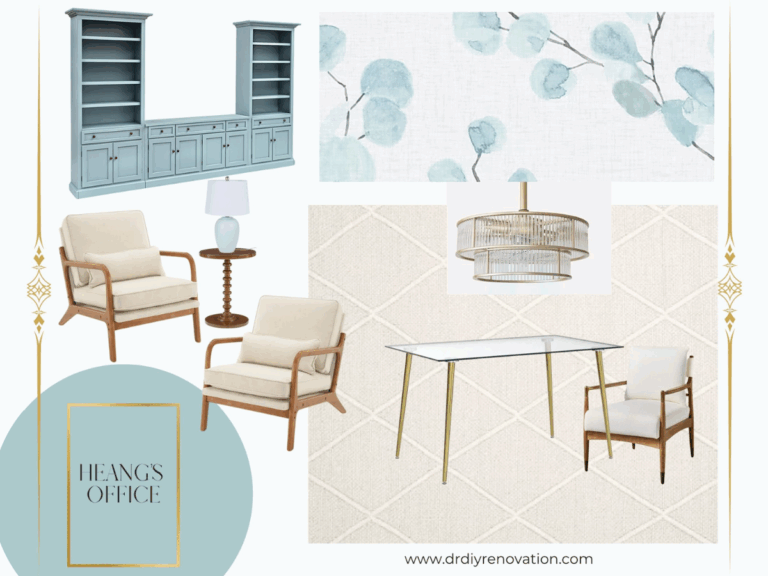
Tools like Canva and Coolors can help you generate color palettes. I like to place my inspiration color in the bottom left corner so I can see how it coordinates with all the elements I choose.
4. Select Key Elements
Now that you have inspiration and a color scheme decide on the specific materials and elements you’ll incorporate. This could include:
- Types of wood or metals
- Fabrics or textiles
- Patterns or motifs
- Paint finishes and hardware
It’s helpful to start with elements you already own, like family heirlooms or large pieces of furniture you intend to keep.
5. Arrange Your Mood Board
Once you’ve gathered all the pieces, it’s time to assemble your mood board. You can do this physically or digitally:
- Physical Mood Board: Use a corkboard or poster board and attach images, fabric swatches, and material samples with pins or glue.
- Digital Mood Board: Use an app like Canva to arrange your images in a visually appealing layout.
6. Review and Refine
Take a step back and review your mood board. Ask yourself:
- Does everything work well together?
- Is there a consistent theme and style?
- Do the materials and colors complement each other?
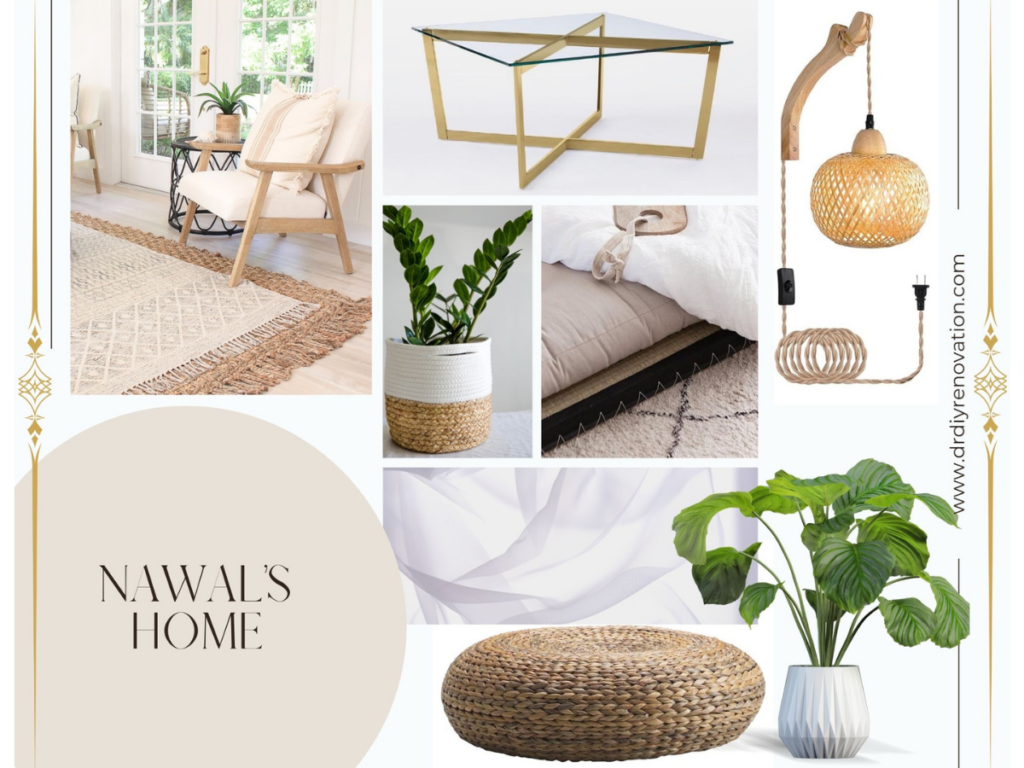
Make adjustments as needed until the board fully reflects your vision. The board below is a great example of how elements blend really well together to create a cohesive style.

7. Use Your Mood Board as a Reference
Once your mood board is complete, keep it handy while working on your DIY project. It will serve as a guide when shopping for materials, selecting paint colors, or making design decisions.
Tips for Making the Most of Your Mood Board
- Don’t Overcrowd: Keep your board focused and curated rather than cluttered.
- Be Open to Tweaks: Your initial vision will evolve, and that’s okay.
- Use Real Samples: If possible, include fabric swatches or paint samples.
- Stay Consistent: Don’t add anything that doesn’t align with your design. If there’s a pillow you really love, but it doesn’t go, save it for another space!
I’ve really enjoyed creating mood boards for my designs. It’s a fun and effective way to plan a DIY project. It allows you to visualize your ideas, stay organized, and make sure your final result aligns with your expectations. If you want to more design inspiration for your next DIY, follow along on TikTok. That’s where you can find the most up-to-date details on my projects.
![Thrifty Kids Playroom Makeover for Older Kids [On A Budget]](https://drdiyrenovation.com/wp-content/uploads/2024/03/IMG_6838-768x576.jpg)
One Comment
Comments are closed.